How To Recalibrate Steering Angle Sensor After Battery Change on Honda CR-V. Step-by-Step Guide
- Battery disconnect resets steering angle sensor calibration
- Affects VSA, LKAS and stability control systems
- Warning lights may appear after reconnecting
- Requires recalibration to restore proper function
- Essential step for correct driver-assist operation
How To Recalibrate Steering Angle Sensor After Battery Change: Changing the 12-volt battery on a Honda CR-V is a straightforward maintenance task that most owners can complete in twenty minutes. What is less straightforward — and what most battery replacement guides fail to mention — is what happens immediately afterward. The Honda CR-V’s Steering Angle Sensor loses its calibration reference point every time battery power is interrupted, including during a battery swap. The result is a cluster of warning lights on the dashboard, impaired Vehicle Stability Assist behaviour and, on CR-Vs equipped with Lane Keeping Assist and Honda Sensing, degraded driver assistance performance until the sensor is correctly recalibrated. This guide explains why this happens, what symptoms indicate an uncalibrated steering angle sensor and the exact procedure to restore full system function after any battery disconnection.
Why a Battery Change Affects the Steering Angle Sensor
The Steering Angle Sensor — abbreviated SAS — is a rotary encoder mounted on the steering column that continuously measures the position, direction and rate of rotation of the steering wheel. It communicates this data to the Vehicle Stability Assist system, the Electric Power Steering system, the Lane Keeping Assist System and, on current-generation CR-Vs with Honda Sensing, the adaptive cruise control and lane centring functions. Every one of these systems requires accurate knowledge of the steering wheel’s current position relative to the vehicle’s straight-ahead centre point to function correctly.
The SAS establishes its calibration reference — the position it treats as steering wheel centre — through an electronic learning process that stores the reference value in volatile memory. When the vehicle’s battery is disconnected, whether for replacement, a jump-start situation or any other interruption to the 12-volt supply, this stored calibration value is cleared. The sensor itself is undamaged. The physical hardware is completely intact. But the electronic reference that tells the system where the steering wheel’s centre position is has been erased, and until the recalibration procedure is completed, the sensor is operating without a reliable reference point.
The practical consequence is a Vehicle Stability Assist system that cannot accurately determine whether the vehicle’s actual direction of travel matches the driver’s intended direction based on steering input — which is the fundamental calculation that stability control intervention depends on. Until recalibration is complete, the VSA system may activate inappropriately, fail to activate when it should or restrict its own operation and illuminate warning lights to signal the fault condition.
Warning Signs That Your CR-V Needs Steering Angle Sensor Recalibration

Several specific indicators appear on a Honda CR-V that has lost its SAS calibration, and recognising them confirms that recalibration — not a sensor replacement or a dealer diagnostic appointment — is the required response.
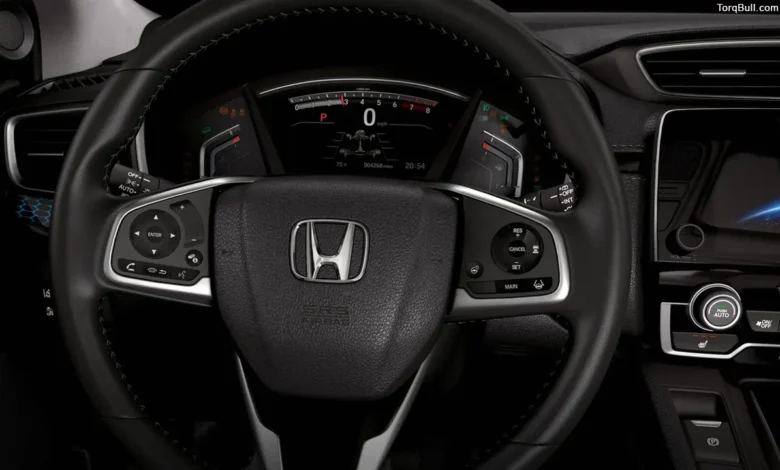
The VSA warning light will illuminate on the instrument cluster, typically accompanied by the VSA Activation Indicator. On CR-Vs equipped with Honda Sensing, the Lane Keeping Assist System warning light will also illuminate, and the system will display a notification that LKAS is temporarily unavailable. The Electric Power Steering warning light may activate on some generation CR-Vs. The steering may feel slightly off-centre or the power steering assistance may feel inconsistent, as the EPS system relies on SAS data to modulate its assist level in proportion to vehicle speed and steering demand.
Critically, none of these symptoms indicate component failure. They indicate a calibration requirement. Driving the vehicle to a dealership with these warning lights active — which would result in a diagnostic charge and a recalibration procedure costing significantly more than the battery replacement itself — is unnecessary for a CR-V owner who follows the procedure described below.
Tools and Conditions Required for Recalibration
The standard steering angle sensor self-calibration procedure for Honda CR-V models does not require any special tools, scan tools or dealer equipment. It requires only a flat, straight road surface, adequate space to perform a complete driving sequence and the CR-V’s normal operational readiness — meaning the engine running, all systems powered and no existing fault conditions beyond the SAS calibration loss.
On later-generation CR-Vs — specifically fifth-generation models from 2017 onward with the Honda Sensing suite — certain calibration functions may benefit from the use of a Honda diagnostic scan tool to confirm that recalibration has completed successfully and that no residual fault codes remain. However, the basic SAS recalibration procedure is almost always successfully completed through the driving procedure alone without any scan tool involvement.
Step-by-Step Steering Angle Sensor Recalibration Procedure
Step 1 — Complete the Battery Replacement and Verify All Connections
Before beginning the recalibration procedure, confirm that the new battery is correctly installed, both terminal connections are fully tightened and all associated covers and brackets have been reattached. A loose terminal connection that allows even momentary voltage interruption during the recalibration drive will reset the procedure and require starting over.
Step 2 — Start the Engine and Allow Systems to Initialise
Start the Honda CR-V’s engine and allow it to idle for approximately two minutes before moving. This allows the Engine Control Module, VSA system, EPS system and all associated control modules to complete their startup self-diagnostic cycles. You will see various warning lights illuminate and extinguish during this period as systems complete their self-checks. The VSA and LKAS warning lights will remain illuminated throughout this period — this is expected and correct.
Step 3 — Drive Straight at a Consistent Speed
Move the vehicle forward in a straight line on a flat, level road surface — a quiet residential street or a parking lot with a long straight section is ideal — at a constant speed of approximately 12 miles per hour. Maintain this speed and keep the steering wheel as close to the straight-ahead centre position as possible for a minimum of 10 seconds. The SAS calibration system uses this driving period to establish the true centre position of the steering wheel relative to the vehicle’s actual direction of travel, using input from the wheel speed sensors and yaw rate sensor to confirm alignment.
Step 4 — Execute a Slow Full-Lock Turn in Both Directions
Bring the vehicle to a safe stop. From the stopped position, turn the steering wheel slowly and smoothly to the full left lock position — the point at which the steering reaches its mechanical limit — then turn slowly and smoothly to the full right lock position, and then return to the straight-ahead centre position. Do not rush this step. The sensor uses this full-range sweep to map the complete rotation range and confirm the centre position relative to the mechanical stops.
Some CR-V model years and generations complete the calibration with Step 3 alone, while others specifically require the full-lock sweep in Step 4. Including both steps ensures the procedure is comprehensive for all CR-V generations.
Step 5 — Drive at Normal Road Speed
After completing the stationary full-lock sweep, resume normal driving at road speeds appropriate for the environment. Drive for a minimum of three to five minutes, including at least one gradual, smooth left turn and one gradual, smooth right turn. The system uses these directional inputs at speed to refine the calibration established in the earlier steps and confirm that the sensor’s readings correlate correctly with the vehicle’s actual turning behaviour as measured by the other chassis sensors.
Step 6 — Confirm Warning Light Extinguishment
In most Honda CR-V cases, the VSA warning light and any associated warning indicators will extinguish within the Step 5 driving period, typically within two to three minutes of normal driving after the full-lock sweep is completed. On some vehicles, the lights may not extinguish until the ignition is cycled — turn the vehicle off, wait ten seconds and restart. After restarting, the warning lights should be absent, confirming that the SAS calibration has been accepted by the system and all VSA and LKAS functions have been restored.
What to Do If Warning Lights Remain After the Procedure
If warning lights persist after completing all six steps and cycling the ignition, the recalibration may require an additional driving cycle — particularly if the procedure was performed in conditions that did not allow a sufficiently straight or level driving surface in Step 3. Repeat the procedure on a different, flatter road surface.
If warning lights persist after two complete attempts at the procedure, an underlying fault unrelated to the SAS calibration may be present. In this case, OBD-II fault code reading with a scan tool — available at most auto parts retailers free of charge — will confirm whether a specific component fault rather than a calibration loss is the root cause. Codes in the VSA, EPS or SAS system code ranges will direct the diagnosis appropriately.
Read: Symptoms of a Failing Honda CR-V PCV Valve. A Complete Diagnostic Guide
Additional Systems That May Need Resetting After Battery Change

The SAS recalibration is the most important post-battery procedure on a Honda CR-V, but several other systems are also affected by battery disconnection and benefit from attention after the battery change is complete.
The power window auto-up and auto-down function requires resetting on most CR-V generations — accomplished by fully lowering each window and then holding the up switch for three seconds after the window reaches the fully closed position. The radio and infotainment system will require the security code to be re-entered on older CR-V models, though newer Bluetooth-paired devices will need to be re-paired. Honda Sensing camera calibration — which is stored separately from the SAS calibration — generally re-establishes itself automatically during normal driving and does not require a specific manual procedure after battery replacement.
Read: 2026 Toyota RAV4 vs 2026 Honda CR-V Reliability Test. Which Compact SUV Will Last Longer?
Honda CR-V SAS Recalibration — Quick Reference Chart
| Step | Action | Duration | Expected Result |
| 1 | Install battery, verify connections | 5–10 minutes | All connections secure, no loose terminals |
| 2 | Start engine, allow idle | 2 minutes | VSA / LKAS lights remain on — normal |
| 3 | Drive straight at ~12 mph | 10+ seconds | SAS establishes centre reference |
| 4 | Full lock left → full lock right → centre | 30–60 seconds | SAS maps full rotation range |
| 5 | Drive normally with gradual turns | 3–5 minutes | System refines calibration |
| 6 | Check warning lights | After step 5 or ignition cycle | All lights extinguish = calibration complete |
| If lights remain | Repeat procedure on flat surface OR scan for fault codes | As needed | Confirm calibration or identify separate fault |