Used Car Inspection Checklist For USA buyers
Buying a used car in the United States is one of the most consequential financial decisions the average American household makes — second in dollar value, for many families, only to the purchase of a home. And yet a striking number of buyers approach that transaction with less systematic rigor than they apply to choosing a restaurant or booking a hotel. The consequences of that gap between the seriousness of the purchase and the informality of the inspection process are well documented: buyers who skip a structured pre-purchase evaluation routinely discover within the first six months of ownership that they have inherited mechanical problems whose repair costs were entirely avoidable. The used car market in 2025 and 2026 is one in which sellers are increasingly sophisticated, vehicle cosmetics can conceal serious mechanical histories, and the gap between a genuinely sound vehicle and an expensively problematic one is rarely visible to the untrained eye at first glance. What separates buyers who walk away from a purchase with confidence from those who walk away with regret is almost always the same thing — a comprehensive, systematic inspection process conducted before a single dollar changes hands.
This guide provides exactly that: a complete used car inspection checklist structured for the American market, covering every category of assessment that a thorough pre-purchase evaluation demands, from paperwork verification through exterior and interior examination to mechanical and safety system assessment — and concluding with the professional pre-purchase inspection that no self-evaluation, however thorough, should replace.
Step One: Start With the Paperwork Before You Touch the Car
The single most important element of any used car evaluation in the United States is one that requires no mechanical knowledge, no tools and no time under the vehicle — it requires only the discipline to verify that the documentation surrounding the vehicle is clean, consistent and free of the red flags that indicate a problematic history before any physical inspection begins.
VIN Verification is the non-negotiable starting point. The Vehicle Identification Number visible on the driver-side top of the dashboard, stamped on the driver-side door jamb, and referenced on the title document must match exactly across all three locations. Any discrepancy — however minor it appears — is an immediate disqualifying red flag that suggests tampering, salvage reassembly or theft history. This check costs nothing and takes thirty seconds, making it the highest-value action available to any used car buyer.
Vehicle History Report is the second step that no buyer should omit. Using the VIN to pull a comprehensive history report through a reputable service reveals accident records, odometer readings across the vehicle’s ownership history, title branding, service records and open recall status — information that the seller is neither required to volunteer nor incentivized to disclose. A history report typically costs between $30 and $45 and represents one of the most cost-effective investments available in the used car buying process.
Title Status requires specific attention to branding categories that carry significant implications for the vehicle’s value, insurability and long-term reliability. A salvage title indicates the vehicle was previously declared a total loss by an insurance company — meaning repair costs once exceeded the vehicle’s assessed value. A rebuilt title indicates a salvage vehicle that has since been repaired and reinspected. A flood title identifies documented water damage history. None of these designations are automatic deal-breakers in every circumstance, but each requires significant price adjustment and professional mechanical assessment before any purchase proceeds.
Open Recalls can be checked free of charge through the National Highway Traffic Safety Administration using the vehicle’s VIN — a search that takes minutes and reveals any unaddressed safety recall that the manufacturer has issued but that the previous owner has not resolved. Open recalls are the seller’s responsibility to disclose but not always their practice to mention.
Step Two: The Exterior Inspection: What the Body Reveals
With documentation verified, the physical inspection begins — and it must begin outside the vehicle, in daylight, on a dry day, with the car parked on a level surface and the engine cold. These conditions are not preferences; they are requirements. Rain and artificial lighting conceal paint inconsistencies and surface defects that daylight exposes immediately. A warm engine masks cold-start behaviors that reveal mechanical condition. A sloped surface compromises suspension assessment.
Walk around every body panel systematically, running your hand along each surface to detect ripples, filled low spots or inconsistencies in surface texture that the eye alone might miss — these are the fingerprints of past collision repair. Check that panel gaps between doors, fenders, hood and trunk lid are consistent in width around their entire perimeter. Uneven gaps indicate either collision damage or the shoddy repair work that often follows it. Paint color and finish must match across every panel — look for overspray on rubber trim seals around doors and the trunk lid, which indicates sections have been repainted rather than matched at the factory. Check door jambs specifically, as paint overspray in these areas is a reliable indicator of bodywork that the seller may not have disclosed.
Rust assessment demands systematic attention to the locations where it hides: wheel arches, the lower edges of door panels, rocker panels beneath the doors, the underside of the trunk and any location where water collects between body panels. Surface rust on exposed steel is manageable. Bubbling paint over structural steel and rust on suspension mounting points or brake lines indicates deterioration that can be both safety-critical and prohibitively expensive to address properly.
Open and gently release each door, including the hood and trunk. A door that feels loose on its hinges or settles imprecisely into its frame suggests the vehicle has not been treated with care. Inspect rubber seals around every door opening for cracking, tearing or compression loss — damaged seals admit water, noise and cold air and hint at the broader attitude toward maintenance that the vehicle’s history reflects.
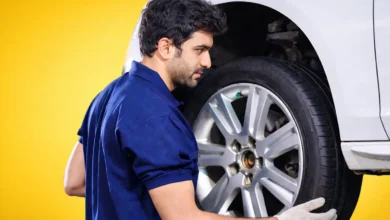
Check each tire for tread depth using the penny test: insert a penny into the tread with Lincoln’s head pointing downward. If his head is fully visible, the tires are worn beyond safe use. Check tread wear across the full width of each tire — uneven wear from inner to outer edge indicates suspension misalignment or steering problems whose cost to correct can easily exceed the value of a price concession.
Step Three: Under the Hood: Reading the Engine’s Biography
The engine bay is the location where the vehicle’s true maintenance history is most legibly written for anyone who knows how to read it. Open the hood after the engine has been cold for at least one hour, and begin with a general assessment of the bay’s condition. Ordinary dust and road dirt accumulate in any engine bay over time and are unremarkable. What warrants attention is oil splattered across surfaces beyond the valve cover, coolant residue around hose connections, corrosion on battery terminals and loose or hanging wiring that indicates amateur repair work.
Check the oil dipstick — the level should be near the full mark, and the oil color on the dipstick should be amber to dark brown for conventional oil. Black, gritty oil indicates overdue service intervals. Milky, foamy oil on the dipstick or underside of the oil filler cap is one of the most serious findings possible — it indicates coolant mixing with engine oil, which is the signature symptom of a blown head gasket and a repair that costs between $1,500 and $3,000 or more depending on the vehicle.
Check the coolant reservoir for level and condition — the coolant should be the color indicated on the reservoir cap (typically green, orange or pink depending on the fluid type), not brown, rusty or empty. Inspect all visible rubber hoses running to the radiator and other cooling system components — squeeze them gently to assess flexibility. Hoses that are brittle, cracked or soft and spongy are overdue for replacement. Check belts visible in the engine bay for cracking, fraying or glazing across their surface. A worn serpentine belt that fails can disable the charging system, power steering and engine cooling simultaneously.
Step Four: Interior and Safety Systems
The interior assessment provides two distinct categories of information: the vehicle’s maintenance story as told by wear patterns, and the operational status of safety and comfort systems whose repair can carry significant cost. Begin with odometer consistency — excessive wear on driver’s seat fabric, carpet, pedal rubber and steering wheel that does not match the reported mileage is a reliable indicator that the odometer reading has been tampered with. Consistent, proportionate wear across all high-contact surfaces is the pattern of a genuinely low-mileage vehicle.
Verify that every warning light illuminates briefly and then extinguishes when the ignition is turned on — this confirms the instrument cluster’s self-test function is operating. Any warning light that remains illuminated after engine start — check engine, ABS, airbag, traction control — demands explanation before the purchase proceeds. Multiple warning lights active simultaneously indicate a seller who may have stopped addressing maintenance issues rather than a vehicle whose problems are minor.
Test every electrical system: windows up and down on all four positions, central locking from both driver and passenger doors, air conditioning output (which should produce cold air within thirty seconds on a warm day), heater output, all exterior lights including turn signals and reverse lights, infotainment connectivity for wireless phone integration, and all speaker positions. Electrical repairs on modern vehicles are labor-intensive and unexpectedly expensive — a non-functioning rear window defroster or a faulty power seat motor that appears trivial during inspection can generate a repair estimate that surprises buyers who did not factor it into their negotiation.
Step Five: The Test Drive That Reveals What Everything Else Cannot
A structured test drive covers conditions that a stationary inspection cannot access: cold-start behavior, warm-engine shifting quality, suspension response to road surface irregularities, braking performance and the subtle behaviors of transmission, steering and engine that only emerge under varied real-world driving loads.
Start the engine cold — ideally after the vehicle has sat overnight — and listen for the first few seconds of operation. Knocking, rattling or a sustained rough idle that does not smooth within thirty seconds of warm-up indicates internal engine wear or fuel system issues. During the drive, accelerate firmly through the full throttle range and monitor for hesitation, surging or the delayed response of a turbocharger that is losing efficiency. Test braking from 40 miles per hour on a clear road — the vehicle should stop straight and progressively without pulling to either side, vibrating through the pedal or producing grinding sounds. Vibration through the brake pedal indicates warped rotors. Pulling to one side indicates uneven brake application or suspension misalignment.
Drive over a rough surface at low speed and listen for clunks, rattles or banging from the suspension — these are the sounds of worn ball joints, strut mounts or control arm bushings whose replacement costs accumulate quickly. On a clear stretch, release the steering wheel briefly at highway speed to verify the vehicle tracks straight without correction.
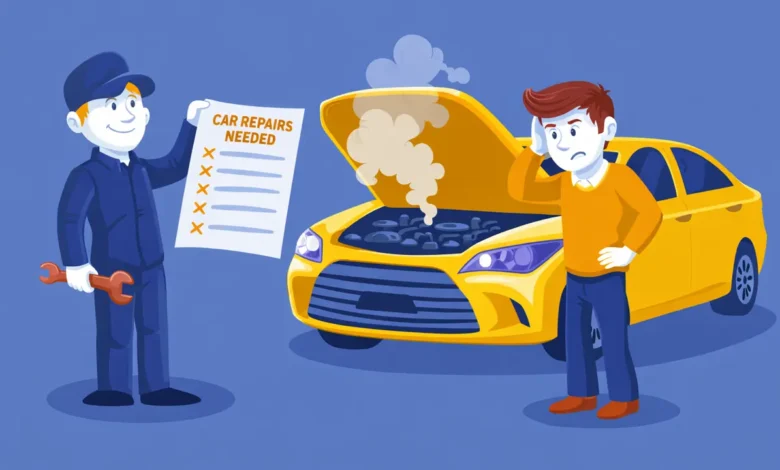
Step Six: The Professional Pre-Purchase Inspection
Every self-conducted inspection, however thorough, is limited by one fundamental constraint — it cannot put the vehicle on a lift, connect a professional OBD-II diagnostic scanner to its computer system, or assess the structural and mechanical conditions visible only from underneath. A professional pre-purchase inspection performed by an independent, ASE-certified mechanic addresses all three limitations and costs between $100 and $250 at most independent shops in the United States — a figure that represents one of the most defensible expenditures available to any used car buyer. The instruction to use an independent mechanic — not the selling dealer, not a shop recommended by the seller — is important precisely because the objectivity of the inspection is its entire value. Buyers who invest in a professional pre-purchase inspection either negotiate the identified repair costs off the purchase price, request the seller address specific issues before sale completion, or walk away from a vehicle whose hidden problems would have cost them far more than the inspection fee within months of purchase.
Read: 2026 Car Insurance Cost By State USA Comparison
Used Car Inspection Checklist Quick Reference Summary
| Category | Key Checks |
| Paperwork | VIN match (dash/door/title), vehicle history report, title branding, open recalls |
| Exterior | Panel gaps, paint consistency, rust locations, door seals, tire tread and wear pattern |
| Under Hood | Oil color and level, coolant condition, hose and belt condition, fluid leaks |
| Interior | Wear consistency with mileage, warning lights, all electrical and safety systems |
| Test Drive | Cold start, acceleration, shifting, braking, suspension noise, straight tracking |
| Professional PPI | Lift inspection, OBD-II scan, written report, independent mechanic only |