How to Update Tesla Model 3 Software Without Visiting the Dealer. Why Some Owners Never Get Them
- Tesla updates delivered over-the-air automatically
- No dealership visit or service appointment needed
- Use advanced update settings for faster access
- Keep vehicle connected to home Wi-Fi
- Install updates overnight while parked
How to Update Tesla Model 3 Software: One of the most genuinely transformative aspects of Tesla ownership — and one that owners from traditional automotive brands consistently underestimate before their first Tesla — is the over-the-air software update. Every Tesla Model 3 receives its software updates wirelessly, downloaded over Wi-Fi and installed while the car is parked, without a dealer visit, a service appointment or any owner involvement beyond tapping a button on the touchscreen or the Tesla app. The car that leaves the showroom in January is not the same car in December — it has received new features, safety improvements, performance refinements and bug fixes across every system, delivered silently and automatically while it sat in the driveway overnight. Tesla’s most recent software version — 2026.14.1 as of April 2026 — includes AI assistant improvements, enhanced visualisation for Highland-generation Model 3s and trip statistics upgrades, all delivered without a single Model 3 owner visiting a service centre. This complete guide explains exactly how the process works, how to configure the car for fastest updates, how to check the current software version, how to initiate and schedule installations and how to troubleshoot when updates fail to appear.
How Tesla’s Over-the-Air Update System Works
The Tesla Model 3’s over-the-air update system works in two distinct sequential phases: download and installation. Understanding both phases eliminates the confusion many new owners experience when updates appear to be available on TeslaFi or the owner community but have not yet appeared on their specific vehicle.
The download phase occurs automatically when the Model 3 is connected to a Wi-Fi network. Tesla’s servers push the update file to the vehicle over the internet connection, storing it locally on the car’s onboard computer. The download can happen while the car is driven — though Tesla’s official guidance notes that driving can interrupt the download if the vehicle loses its Wi-Fi connection while the download is in progress. For the fastest, most reliable downloads, the car should be parked at home, connected to the home Wi-Fi network and plugged into a charger. A green downward arrow icon appears at the top of the touchscreen when a download is actively in progress.
The installation phase is separate from the download and requires the car to be parked. The vehicle cannot be driven during installation, and it will not charge during the installation process even if connected to a charger. Some software updates complete installation in 15 to 30 minutes. Others — particularly major feature releases — can take several hours. Tesla recommends scheduling installations for overnight periods when the car is not needed, allowing the process to complete without affecting the next day’s driving plans. A yellow clock icon on the touchscreen indicates that a downloaded update is ready to install.
The entire system is designed to be invisible and non-disruptive during normal ownership — the car checks for available updates automatically, downloads them automatically when connected to Wi-Fi and notifies the owner when they are ready to install. No owner action is required for the download phase; the only decision the owner makes is when to install.
Read: Tesla Model 3 Real-World Range at 75 MPH. Road Trip Planning Numbers You Actually Need
Step 1: Connect Your Tesla Model 3 to Home Wi-Fi
Wi-Fi connectivity is the foundational requirement for receiving Tesla software updates. The Model 3 has built-in cellular connectivity — the standard premium connectivity that comes with new Tesla vehicles — but Tesla’s own guidance states that most updates require Wi-Fi for download. Cellular data can initiate some update processes, but the full download of a major software release reliably requires a Wi-Fi connection for speed and data volume reasons.
To connect the Model 3 to a home Wi-Fi network, tap Controls on the touchscreen, then tap Wi-Fi. The car will scan for available networks and display a list. Select the home network, enter the password and confirm the connection. The Wi-Fi symbol in the top status bar confirms an active connection. For fastest update delivery, park the Model 3 within reliable Wi-Fi signal range of the home router — the car’s Wi-Fi antenna is adequate for typical residential distances but may struggle with a router located on the far side of a large property.
If the home Wi-Fi signal does not reach the garage adequately, a Wi-Fi extender positioned closer to the parking area resolves the connectivity issue. Recharged’s guidance on Tesla ownership specifically identifies strong home Wi-Fi as the single most impactful practice for keeping a Tesla current — treating the car like a laptop that lives in the garage and requires consistent connectivity to stay updated.
The Model 3 remembers saved Wi-Fi networks and reconnects automatically when parked in range. A car that has been connected to the same home network for months will connect without any owner action each time it returns to the garage.
Step 2: Set Software Update Preference to Advanced
Tesla provides two software update preference settings — Standard and Advanced — that determine how quickly the vehicle receives updates after they are released. The setting is configured directly on the touchscreen.
To access it, tap Controls, then tap Software. The Software Update Preference option is displayed on this screen. Select Advanced to receive software updates as soon as they become available for the specific vehicle configuration and region. Standard holds the update until it has been deployed to a broader group of vehicles and has been running in the field for a period of time — providing additional assurance that no significant issues emerged in the initial rollout.
Tesla’s official guidance is explicit: selecting Advanced and consistently connecting to Wi-Fi is the best way to quickly receive the latest software updates. The distinction is meaningful. An owner in the Tesla Owners Online forum reported switching to Advanced and receiving a new update within hours of making the change. Another owner on the same thread described waiting 44 days on Standard without receiving an update that had been available for weeks.
It is important to understand what Advanced does not mean. As Tesla’s official Model 3 Owner’s Manual states, choosing Advanced does not enrol the vehicle in Tesla’s early access program, and Tesla does not update software upon request even for Advanced-preference vehicles. Tesla determines the timing of updates based on factors specific to each release, including region, hardware generation and rollout sequencing. Advanced simply places the vehicle at the front of the available rollout rather than waiting for a later deployment wave.
Hardware generation also determines which features are available in any given update. HW4 hardware — found in Model 3 Highland and Y Juniper vehicles from mid-2023 onwards — receives all updates including Grok AI assistant and full FSD features. HW3 hardware receives most comfort updates but not Advanced FSD capabilities. Earlier hardware receives bug fixes and minor improvements. The touchscreen’s Controls menu identifies the car’s hardware configuration.
Step 3: Check Your Current Software Version
To see the current software version installed on the Model 3, tap Controls on the touchscreen, then tap Software. The current version number is displayed on this screen, along with a timestamp showing when the software was last checked for updates. The screen also displays “Your car software is up to date” when no newer version is available for the vehicle’s configuration.
A car whose software check timestamp shows several weeks in the past may have been offline during that period — parked without Wi-Fi access or driven without returning to the home network. Reconnecting to Wi-Fi triggers an immediate update check. The Tesla app on the owner’s smartphone also displays the current software version and provides a Software Update notification on the main app screen when an update is ready for installation.
Third-party tracking services such as TeslaFi and Not a Tesla App maintain public databases of firmware versions, rollout percentages and release notes. These services allow owners to see whether a specific update has been released to other vehicles with similar configurations, providing a reference point for whether a pending update should be expected or whether the car is already current.
Step 4: Initiate and Schedule the Update
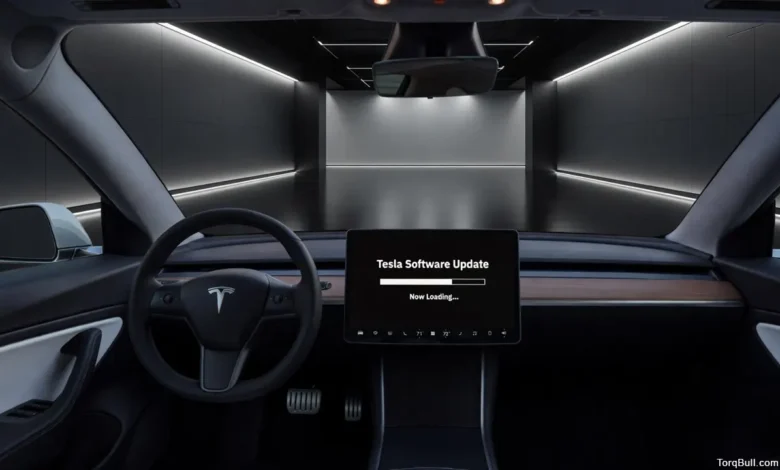
When a software update is downloaded and ready to install, the Model 3 displays a notification on the touchscreen and sends a push notification to the Tesla app on the owner’s phone. The yellow clock icon appears at the top of the touchscreen. At this point, the owner has two choices: install immediately or schedule for later.
To install immediately, tap the yellow clock icon and select Install Now. The car will begin the installation process, which prevents driving until complete. This option suits owners who have time available and want the update applied as quickly as possible.
To schedule installation for a specific time, tap the yellow clock icon and select Schedule. The scheduling window allows the owner to select a future time — typically overnight — when the car will install the update automatically. This option is ideal for owners who need the car available during the day and prefer to have updates apply while the car is parked overnight.
The Tesla app provides an equivalent installation trigger. If a Software Update section appears on the main page of the app, tapping it allows the owner to start the download or installation remotely without being near the car. This is particularly useful for initiating an install before heading out in the morning, or confirming that a scheduled overnight install completed successfully.
Step 5: Troubleshooting When Updates Are Not Arriving
The most common reason a Tesla Model 3 does not receive expected updates is Wi-Fi connectivity — either the car is not connected to a network, the network signal is too weak for a reliable download or the car has been away from the home network for an extended period.
If the update preference is set to Advanced and the car is consistently connected to home Wi-Fi but updates are still not appearing, the most likely explanation is that the update has not yet been staged for the specific vehicle configuration and region. Tesla rolls out updates in waves — even with Advanced preference, some vehicles receive a given update days or weeks after others with equivalent hardware. This is normal behaviour and not a malfunction.
If the touchscreen displays a message indicating that a software update was not successfully completed, Tesla’s official guidance is to wait for the next software update deployment — attempted troubleshooting of a failed install is rarely productive, as the next successful deployment will overwrite the failed state. A soft reboot of the touchscreen — pressing and holding both scroll wheel buttons simultaneously until the Tesla logo appears, then waiting for the system to restart — can sometimes clear the notification without resolving the underlying issue.
Read: Can the Cayenne Electric Beat Tesla Model X Plaid Performance Expectations?
What Every 2026 Tesla Model 3 Software Update Delivers
Tesla releases major software updates every three to six weeks, with the most significant being seasonal packages that include substantial new features. The 2026 Spring Update — version 2026.14 — introduced voice activation of Grok AI with the “Hey Grok” trigger phrase, improved car visualisation rendering for Highland-generation Model 3s, enhanced trip statistics and new Sketchpad features. The 2026.2.9 update earlier in the year removed the Autopilot name to unify the interface around FSD and added an improved vision encoder for better environmental perception.
Historical major updates include Grok Beta voice assistant with selectable personalities in 2025.26, Tron Mode in 2025.32, 3D city building visualisation in maps, Light Sync ambient lighting that responds to music and Supercharger Live Activity integration with iPhone and Apple Watch. Every one of these features was delivered to existing Model 3 owners without a dealer visit, without a fee and without any action beyond tapping Install.
Read: Tesla Model 3 vs Toyota Prius. Which Car Actually Wins In 2026?
Tesla Software Update Process — Quick Reference Chart
| Step | Action | Location | Notes |
| 1. Connect to Wi-Fi | Tap Controls > Wi-Fi > Select network | Touchscreen | Essential for download; leave connected when parked |
| 2. Set update preference | Controls > Software > Software Update Preference > Advanced | Touchscreen | Advanced = fastest available delivery |
| 3. Check current version | Controls > Software | Touchscreen | Also viewable in Tesla app |
| 4. Monitor for update | Yellow clock icon on touchscreen / Tesla app notification | Both | Appears when update is ready to install |
| 5. Install or schedule | Tap yellow clock icon > Install Now or Schedule | Touchscreen or app | Car must be parked; cannot drive or charge during install |
| 6. Verify completion | Controls > Software > new version number displayed | Touchscreen | Confirm after install |