DIY Car Maintenance Tips for Beginners. Save Upto $500 Every Year By Learning Them
- Basic DIY tasks like oil checks and air filter replacement
- Tyre rotation and wiper blade changes
- Jump-starting a dead battery safely
- Preventive maintenance to avoid costly repairs
- Saves $500–$1,500 annually in labour costs
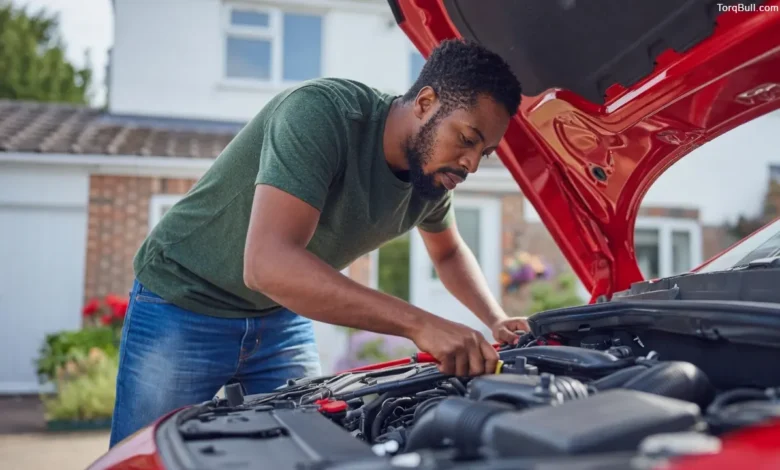
DIY Car Maintenance Tips for Beginners: The average American spends approximately $1,013 per year on vehicle maintenance and repairs according to Consumer Affairs data — and a significant proportion of that cost is not parts but labour. A cabin air filter that costs $15 at an auto parts retailer becomes a $75 service appointment when a dealership or shop replaces it. An oil change that costs $35 in materials becomes a $95 line item when booked through a service centre. The skills required to perform these services are not complex. They do not require a mechanical engineering degree, a professional lift or an expensive tool set. They require a basic understanding of where specific components are located, what they look like when they need replacement and how to perform straightforward tasks safely. This guide teaches exactly those skills — ten foundational DIY car maintenance tasks that every beginner can learn and perform with common tools and materials available at any auto parts store.
Important: Always consult your vehicle’s owner’s manual before performing any maintenance. If you are uncertain about any procedure, consult a qualified mechanic. Never work under a vehicle supported only by a jack — always use jack stands.
Why DIY Car Maintenance Makes Financial and Practical Sense
Before the specific techniques, the financial case for learning basic car maintenance is worth establishing clearly — because the savings are larger than most drivers appreciate and compound meaningfully across a typical ownership period.
A professional oil change at a dealership costs $75 to $120 for full synthetic oil service. A DIY oil change using the correct manufacturer-specified oil and filter costs $35 to $55 in materials. Performed four times per year, the saving is $160 to $260 annually on this single service alone. A cabin air filter replacement at a dealership costs $60 to $90 in most markets. The filter costs $15 to $25 at retail. A new set of wiper blades installed at a service centre costs $50 to $80 with labour. Purchased and installed independently, the same blades cost $25 to $40. Tyre rotation — an every-5,000 to 7,500-mile service — costs $25 to $50 at a shop. With the correct tools, it is free.
Across a full year of typical vehicle ownership, a driver who learns the ten tasks in this guide realistically saves $500 to $1,500 in annual service costs — more for drivers of European luxury vehicles where labour rates are higher. The tools required for these tasks — a basic socket set, an oil drain pan, a jack and jack stands — represent a one-time investment of approximately $150 to $250 that pays for itself in the first service interval.
Tip 1: Check Engine Oil Level and Condition
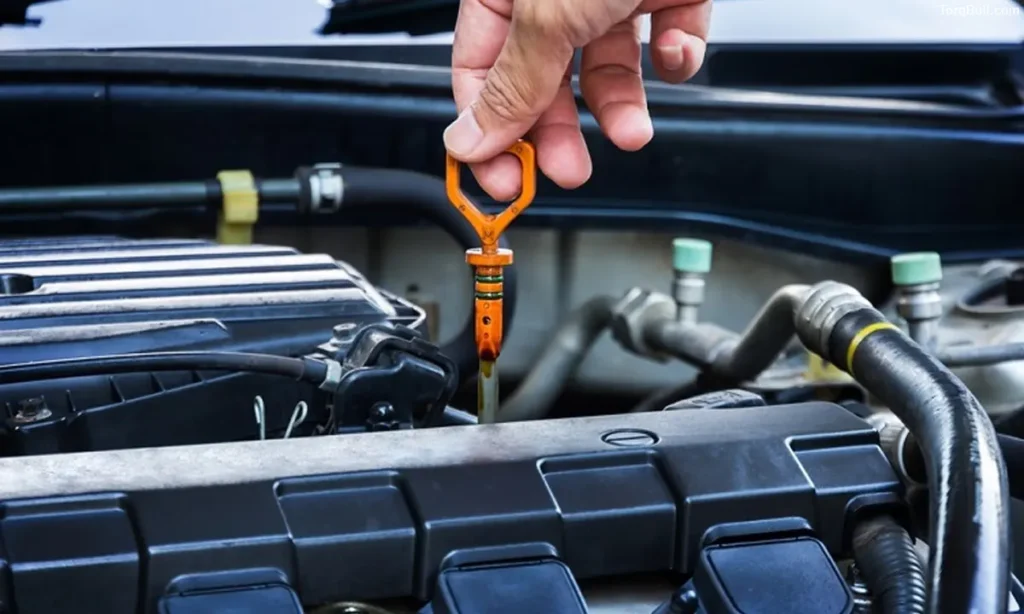
Frequency: Monthly | Tools Required: Paper towel | Difficulty: Beginner
Checking engine oil is the single most important preventative maintenance task a driver can perform, and it takes approximately two minutes. Park the vehicle on level ground and allow the engine to cool for ten to fifteen minutes after driving. Locate the oil dipstick — a brightly coloured pull-tab, typically yellow or orange, attached to a long metal rod — in the engine bay. Pull it out, wipe it clean with a paper towel, reinsert it fully and pull it out again to read the level. The dipstick has two marks indicating the minimum and maximum oil level — the oil film should sit between these marks.
Check the oil’s colour and consistency on the paper towel. Fresh oil is amber-coloured and slightly translucent. Dark brown or black oil indicates it has aged and should be changed. Grey or milky oil suggests coolant contamination — a serious problem requiring professional attention. A gritty texture indicates contamination. If oil level is low, add the grade specified in the owner’s manual — never mix different viscosity grades or brands in significant quantities.
Tip 2: Check and Top Up Engine Coolant
Frequency: Every three months | Tools Required: None | Difficulty: Beginner
The coolant reservoir — a translucent plastic tank connected to the radiator — is visible in most engine bays without opening any components. Locate it and check that the fluid level sits between the minimum and maximum markings on the reservoir’s side. Never open the radiator cap or coolant reservoir cap on a hot engine — the system is pressurised and scalding coolant can spray under pressure. Wait until the engine is fully cold.
If coolant level is low, top up with the correct coolant type specified in the owner’s manual — coolant specifications vary, and mixing incompatible types degrades the mixture’s protection properties. Pre-mixed coolants eliminate the need to dilute concentrate with distilled water. A consistently low coolant level despite repeated top-ups indicates a leak that should be inspected professionally.
Tip 3: Replace the Engine Air Filter
Frequency: Every 15,000–30,000 miles | Tools Required: Screwdriver or socket | Difficulty: Beginner
The engine air filter removes dust, debris and contaminants from air entering the engine. A clogged filter reduces airflow, decreasing fuel efficiency and performance. On most vehicles, the air filter is housed in a rectangular plastic box — the airbox — connected to a large intake tube near the front of the engine bay. Remove the clips, screws or clamps securing the airbox lid, lift the lid and pull out the filter. Hold the old filter toward a light source — if you cannot see light through it, replacement is overdue. Insert the new filter in the same orientation as the old one and reseal the housing. The entire process takes approximately five minutes.
Tip 4: Replace the Cabin Air Filter
Frequency: Every 12,000–15,000 miles | Tools Required: None on most vehicles | Difficulty: Beginner
The cabin air filter cleans air entering the passenger compartment through the climate control system. On most modern vehicles, it is located behind the glove compartment and is accessible by opening the glove box, pressing inward on the sides to release it beyond its normal range and lowering it to expose the filter housing. Pull out the old filter — which will likely show a visible accumulation of dust, pollen and debris — slide in the replacement in the correct orientation (indicated by an airflow direction arrow on most filters) and reassemble. On some vehicles the filter is accessible under the dashboard or in the engine bay. The owner’s manual identifies the exact location. The labour portion of a dealer cabin filter replacement takes approximately three minutes — the same time the task takes at home.
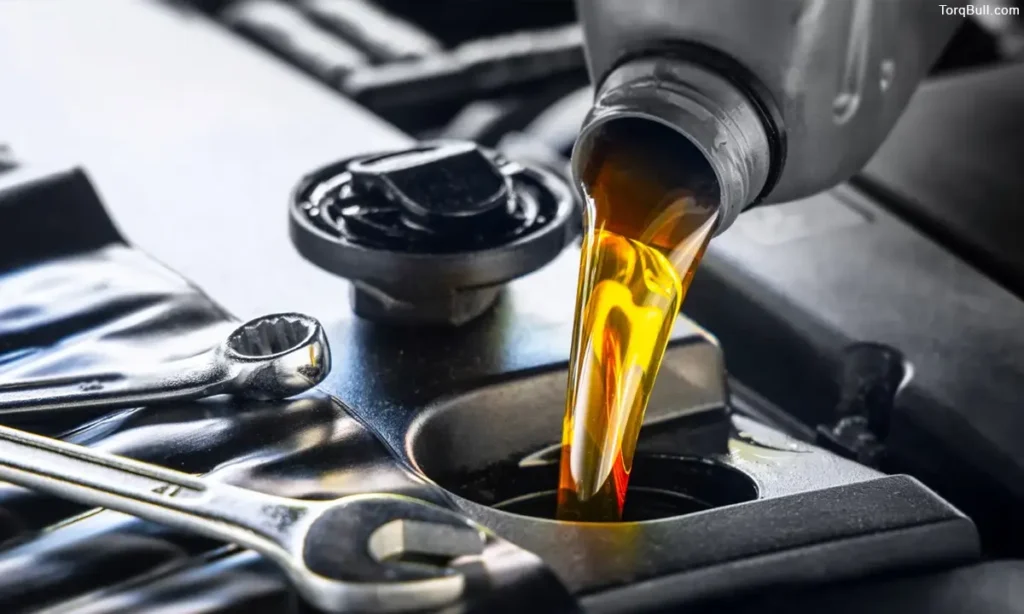
Tip 5: Change Engine Oil and Filter
Frequency: Every 5,000–10,000 miles depending on oil type and manufacturer | Tools Required: Socket set, oil drain pan, oil filter wrench | Difficulty: Moderate Beginner
An oil change is the most financially rewarding DIY maintenance task and the one most worth learning. Warm the engine for two minutes — warm oil drains more completely than cold — then switch off the vehicle. Raise the front of the car using a jack and secure it on jack stands. Locate the oil drain plug on the bottom of the oil pan — a bolt at the lowest point of the engine — and position the drain pan beneath it. Remove the drain plug with the correct socket and allow oil to drain fully. Remove and replace the oil filter using an oil filter wrench or by hand with a firm grip and a cloth for traction. Reinstall the drain plug with a new washer if specified. Lower the vehicle, add the manufacturer-specified oil type and quantity through the oil filler cap on top of the engine, check the level with the dipstick and run the engine briefly to check for leaks. Dispose of used oil at any auto parts retailer or service station — most accept it free of charge.
Tip 6: Replace Wiper Blades
Frequency: Every 6–12 months or when streaking begins | Tools Required: None | Difficulty: Beginner
Wiper blades are packaged with installation instructions specific to the three common wiper arm attachment types: hook, pinch tab and side pin. The blade packaging identifies which type the vehicle uses by year, make and model. Lift the wiper arm away from the windscreen to its vertical position. Locate the release tab where the blade connects to the arm, press it and slide the blade off the hook. Slide the new blade onto the hook in the reverse direction until it clicks positively into place. Repeat for the second blade and, if the vehicle has a rear wiper, the rear blade. Lower the arm carefully — do not allow it to snap back against the windscreen without a blade attached, as the arm will crack the glass.
Tip 7: Check and Inflate Tyre Pressure
Frequency: Monthly and before any long journey | Tools Required: Tyre pressure gauge, compressor or air pump | Difficulty: Beginner
The correct tyre pressure for the vehicle — not the maximum pressure listed on the tyre sidewall — is printed on a sticker inside the driver’s door jamb or in the owner’s manual. Remove the valve cap from each tyre, press the gauge firmly onto the valve stem to get an accurate reading and compare to the specification. Tyres lose approximately one pound per square inch per month naturally and additional pressure in cold weather. Add air using a portable compressor or a petrol station air pump until the correct pressure is reached. Check all four tyres and the spare. Tyres consistently losing pressure without any driving on rough surfaces should be inspected for slow punctures.
Tip 8: Jump-Start a Dead Battery Safely
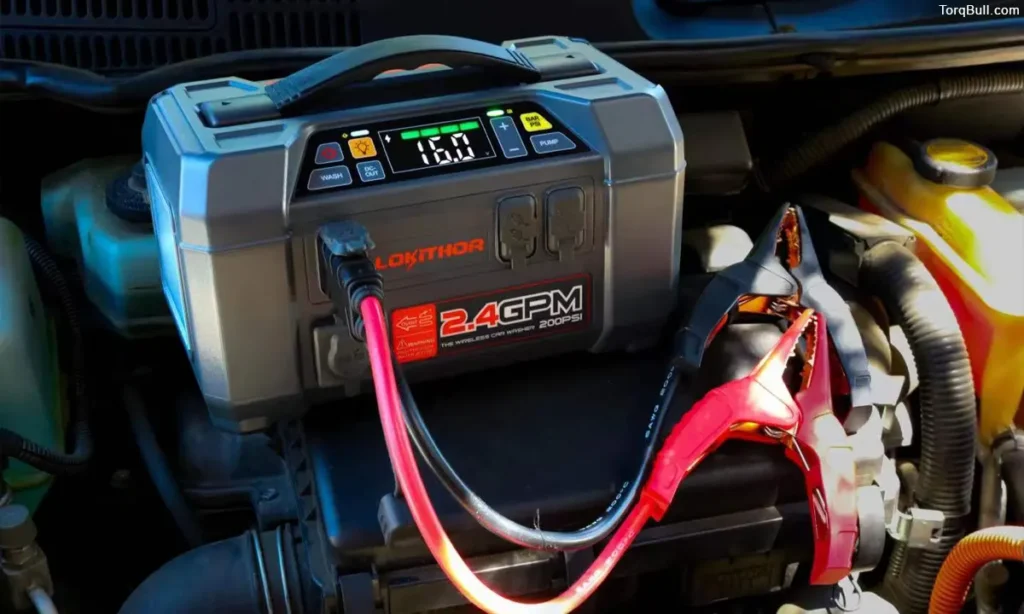
Frequency: As needed | Tools Required: Jump leads, second vehicle or jump starter pack | Difficulty: Beginner
A dead battery is one of the most common roadside emergencies and one of the most straightforward to resolve independently. Park the working vehicle so both batteries are accessible. Connect the red positive lead to the positive terminal of the dead battery first, then the positive terminal of the good battery. Connect the black negative lead to the negative terminal of the good battery, then to an unpainted metal surface on the vehicle with the dead battery — not to the dead battery’s negative terminal itself — to reduce spark risk near the battery. Start the working vehicle and allow it to run for two to three minutes before attempting to start the dead vehicle. Once running, remove the leads in reverse order of connection. Drive the vehicle for twenty to thirty minutes to allow the alternator to recharge the battery.
Read: Engine Overheating Causes and Solutions. Here Is Exactly What Is Wrong and How to Fix It
Tip 9: Check Brake Pad Thickness
Frequency: Every six months or when squealing is heard | Tools Required: Flashlight | Difficulty: Beginner
Brake pads can be visually inspected without removing the wheel on most vehicles. Look through the wheel spokes with a flashlight to find the calliper — the clamp-shaped component gripping the brake rotor — and locate the brake pad visible between the calliper and the rotor. Most brake pads have a wear indicator groove or line. If the pad thickness is less than a quarter-inch, or if a metal-on-metal squealing or grinding noise occurs during braking, professional brake service is required immediately. Identifying this early avoids the significantly more expensive consequence of worn pads damaging the brake rotor.
Tip 10: Rotate Tyres
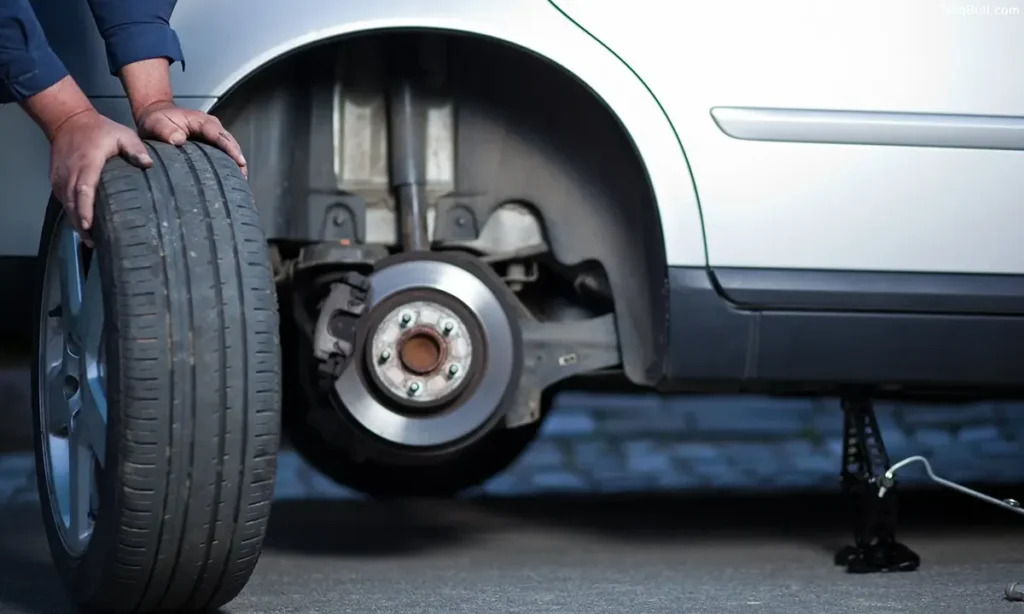
Frequency: Every 5,000–7,500 miles | Tools Required: Jack, jack stands, socket set | Difficulty: Moderate Beginner
Tyre rotation extends tyre life by distributing wear evenly across all four tyres, which experience different forces depending on driven versus non-driven axle position, front versus rear loading and steering input. The most common rotation pattern moves front tyres straight to the rear on the same side and rear tyres straight to the front. Raise the vehicle, support it on jack stands, remove all four wheels and reinstall them in the correct rotation pattern. Confirm that lug nuts are tightened to the manufacturer’s torque specification — a torque wrench costing approximately $30 is necessary for this step. Incorrect lug nut torque can result in a wheel separating from the vehicle under driving conditions.
Read: Brake Pad Replacement Cost In USA. Complete 2026 Price Guide
DIY Car Maintenance Task Reference Chart
| Maintenance Task | Frequency | DIY Cost (Approx) | Shop Cost (Approx) | Annual Saving | Difficulty |
| Oil level check | Monthly | Free | N/A | — | Beginner |
| Coolant check | Quarterly | Free | N/A | — | Beginner |
| Engine air filter | 15,000–30,000 mi | $15–$25 | $50–$80 | $35–$55/interval | Beginner |
| Cabin air filter | 12,000–15,000 mi | $15–$25 | $60–$90 | $45–$65/interval | Beginner |
| Oil and filter change | 5,000–10,000 mi | $35–$55 | $75–$120 | $160–$260/yr | Moderate |
| Wiper blade replacement | 6–12 months | $25–$40 | $50–$80 | $25–$40/set | Beginner |
| Tyre pressure check | Monthly | $10 (gauge) | Free–$5 | Minimal | Beginner |
| Jump-starting battery | As needed | Jump leads $20 | $50–$100 service call | Variable | Beginner |
| Brake pad inspection | Every 6 months | Free | $30–$60 inspection | $30–$60/yr | Beginner |
| Tyre rotation | 5,000–7,500 mi | Free (with tools) | $25–$50 | $50–$100/yr | Moderate |
Building the Right DIY Maintenance Tool Kit
Starting a DIY car maintenance practice requires a modest initial tool investment that pays for itself within the first two oil changes. The foundational kit for performing all ten tasks in this guide includes a basic socket set covering 8mm to 22mm in both metric and standard sizes, an oil filter wrench sized for the vehicle’s specific filter, an oil drain pan of at least six-quart capacity, a hydraulic floor jack rated for the vehicle’s weight, two jack stands rated for the same weight as the jack, a tyre pressure gauge, a torque wrench and a set of jump leads or a portable lithium jump-starter pack. Total investment for quality versions of these tools is approximately $150 to $250 at any major hardware or auto parts retailer.
The single most important resource for any DIY maintenance task is the vehicle’s owner’s manual — which specifies the correct oil grade, filter part number, coolant type, tyre pressure, filter change intervals and torque specifications for every task described above. Many owner’s manuals are available free in PDF format from manufacturer websites for vehicles whose physical manual has been lost. Supplement the owner’s manual with model-specific resources from brand-dedicated owner forums and the vehicle manufacturer’s maintenance schedule page, which provides intervals and specifications for every service task across the vehicle’s designed lifecycle.